
Getting Started - CoreTV
The following article will provide step-by-step instructions on setting up your CoreTV account for the first time.
This article is available as a video guide by clicking here or at the bottom of this page.
Before you get started, make sure you've received your CoreTV invitation by e-mail.
This email will come from Teradek Core, and will contain an access code. Access code emails are only sent when a user has an active subscription.
Step 1 - Download the CoreTV app
On your device, open the Google Play Store (Android) or App Store (Apple iOS).
Go to your search field or button, type in "Core TV", and perform the search.
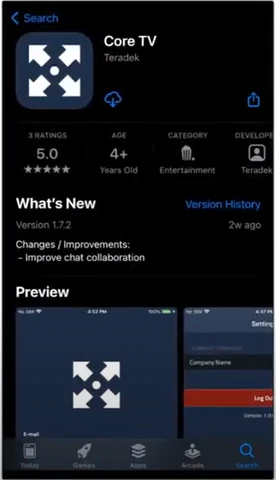
Select the Core TV app by making sure it matches the name and developer (Teradek) as per the image above.
Click to download the app, and wait for it to finish installing.
Step 2 - Logging in to the CoreTV app
Once the installation has completed:
Open the e-mail you received with your access code.
From the e-mail, copy the access code.
Open the CoreTV app
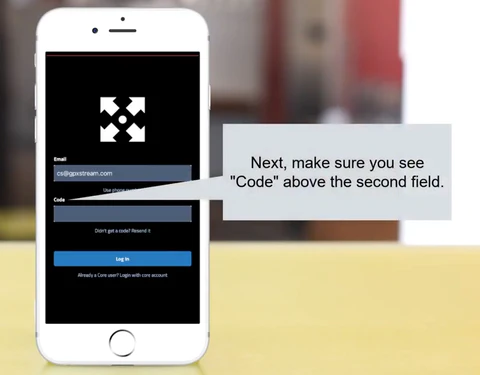
Make sure the page you are on has a field for "Email" and "Code".
Once you are on the correct page - as per the image below - type in the e-mail address at which you received your code, and the code itself. Finally, press "Log In"
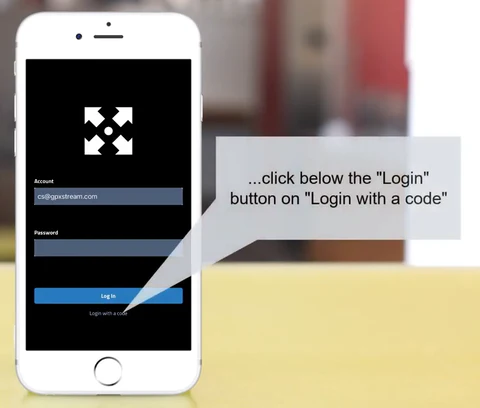
If you see a "Password" field (as per the image below), click the "Login with a code" button.
Step 3 - Choosing your stream
Once you're logged in, the app will show you a grid view of the streams shared with you. If you're used the app before, it will automatically open the latest opened device.
Double tap on the stream you'd like to watch to start the live stream
Please note the video in the preview grid is not live! it is a static image that updates only once every 2 seconds.
Step 4 - Adjusting Streaming Settings
Once you're watching your stream, there are a few settings you can adjust for the best possible experience.
On the top left of the screen, the "Streams" button allows you to return to your list of available streams.
To the right of the "Streams" button, you will find a gear icon that will show/hide the delay bar.
The delay bar on the bottom allows you to adjust the delay of incoming video from the server to your device.
This has no impact on the latency between the vehicle and the server, a delay which is always set to 0ms.
If connection is poor on the viewing device, you can increase the delay slider to build more buffer locally and have a smoother stream.
If video skips and interruptions do not improve, it is most likely that interruptions are caused by the outgoing video from the vehicle to the servers.
We recommend starting at 0ms and increase by 100ms at a time to determine if the stream improves.
Finally, the "Auto" button automatically adjusts the delay of the incoming video and should always be kept off.
The Auto toggle prioritizes quality over latency, and as such is not an appropriate setting to have "on" for use with the GPX Stream system.
Video

This video is hosted on YouTube and requires cookies to view.
YouTube Privacy Policy